The v1 Editor
Why the Sandhills CMS?
The Sandhills CMS is specifically developed to help make editing your website as easy as possible. The Sandhills CMS lets you edit content in real time right there on the live page. When you click the save button, the page should look almost identical to what you had just finished editing.What makes our editor different is the fact that it uses the exact same live data and style rendered in the same space as the finished content. When you hit the save button, you know exactly how your page will render. You don’t have to switch back and forth between the editor and the live site to see what your changes look like.
This is not only less cumbersome, but also a far more intuitive way to edit your content. In many ways, the editor resembles a simple graphical word processing software that you are likely familiar with, like MS Word. In fact, the editor is specifically designed to be used by people with no web experience. If you have any basic computer skills, you should be able to successfully edit a Sandhills WordPress website.
What Can I Edit?
In the Sandhills Editor, you have control over any region that has a blue border around it. These "widget" areas are the basis of the editor. There are lots of different widgets, but the most common are the editable area widgets. These hold the vast majority of your content and are where you will edit text, photos, and other content.

You can easily tell where widgets are. When the editor is turned on, they are surrounded by a thin blue border. When a specific editable region is selected, you will see that border become a blue drop shadow. Just click on a region to make it active.
We will get into how to add and manage widgets later. Right now, just know that you should be able to edit any content inside any section with a blue border.
A Brief Tour of the Editor

Like MS Word, most of the text editing functions lie in a toolbar at the top of the site. There are actually 3 rows of controls that make up the different sections of the editor. We will tackle them from the bottom up as that is the order you will generally use them.
BOTTOM ROW -The WordPress Menu Bar.
The bottom row is almost black and is visible when in or out of editing mode. It is the standard WordPress editing bar, but with a few new additions. Most notably, the SANDHILLS EDITOR all the way to the right. It toggles the rest of the editor (the lighter grey bars) off and on.
-
Prevent Site Editing / Unlock Site
This just tells you whether you can edit it or not . If it’s locked, the black bar will be red and you will not be able to edit your site. This usually signifies that a Sandhills Designer is working on your site. Contact your sales rep if you need this turned off so you can edit your site again.
-
WordPress Logo
Links to different WordPress help and support resources.
-
+ New
Allows you to add new WordPress pages or posts. For more on creating new pages, click here .
-
Plugin Area
You might see a few logos for plugins that are installed. Most noteably Yoast & Smart Slider.
-
WP Dashboard
This opens up the WordPress Dashboard in a new tab, giving you access to the back end of Word Press.
-
Sandhills Editor
This toggles the rest of the editor off and on. When on (light grey bar visible), you will see light blue outlines around editable content areas. You will also be able to add widgets to Layout Areas. When you click into a bluebordered content area, much of the editor’s features will become active and can be used. You must select the region you would like to edit to activate these tools.
-
Name
This is your username. Hover over this text to get a dropdown menu that will allow you to log out.
MIDDLE ROW - The Text Editor.
The middle row should look familiar to anyone who has used Microsoft Word. This is where we house most of the text editing/styling tools.
-
Style
This can be used to add special styled elements to pages. By default we have some buttons predefined.
-
Block Format
This is the default styling for block level items like < H1 > - < H6 > tags. This will give you easy access to predefined styles from the style sheet to make the site uniform.
-
Colors
The first one is the background color for the text, the second is the text color. Just h ighlight the text you would like to change the color of, click the appropriate box, and choose the color from the pop-up window.
-
Font
This pops open a dialog box that will allow you to choose font families, sizes, weights, colors and alignments. It is pre-populated with the web-safe fonts.
-
Text Formatting
Bold, Italic, Overline, Strikethough, and Underline. Pretty standard stuff.
-
Text Alignment
Left, Center, Right, and Justified alignment. Also pretty standard.
-
Bullets/Ordered Lists + Indenting Controls
These are your standard < ol > and < ul > lists. You can use the two arrow buttons to change the levels each element in the list is at.
-
Table management
These allow you to add rows, cells and move things around if you have a table on the page. These are only active if your cursor is inside a table.
-
Horizontal Rule
This is a horizontal rule. It’s not very apparent in its default style, so you’ll want to define it in the stylesheet.
-
X – Remove Formatting
Removes all formatting. Including line breaks. Great for getting rid of the gobbledygook code you get when pasting directly from MS Word or when a bunch ofnested HTML style rules is making it difficult to edit.
-
< > - HTML View Opens a window that shows your active editable area’s HTML and allows you to edit it manually. You cannot add < script > tags, but you can add almost anything else if you know HTML & CSS.
TOP ROW – Dynamic Content Management
The top row is for the bigger jobs. Most of the buttons here will actually open panels that let us add or remove things from the database. Some just allow us to do more complex tasks that you would otherwise have to know some basic HTML to accomplish.
-
Save
Opens pane that will allow you to change the major page settings, like whether the page is published or in draft mode, the page title, metadata, social media tags, etc. This is almost identical to the page creation window.
-
Preview
This basically just hides the blue boxes on the screen so you can see exactly what a saved page would look like.
-
Undo / Redo
You can Undo and Redo your edits as many times as you need up to the last save point. You cannot undo past the last page save.
-
Links This opens the INSERT LINK panel, which we will get into below.
-
Images
This opens the INSERT IMAGES panel, which we will get into below.
-
Video
This opens the INSERT VIDEO panel, which we will get into below.
-
Table
This opens the INSERT Table panel, which we will get into below.
-
Character
This opens the INSERT Character panel. It’s basically a bunch of non-standard characters. Click on the character you would like to insert and it encodes it onto the page in a web-friendly format.
-
Icon
This will allow you to insert an icon from an icon library or character set like Font Awesome. You can browse visually and it will insert the icon where your cursor is, or give you the code to insert manually in HTML view.
-
Meta
This opens the Metadata panel. Most of this info can also be set in the SAVE panel, but there are a few added fields in here that you can use.
-
Ordering
When you click on this, you will see the blue lines go away. The content sections are no longer editable, but they can now be dragged around to re-order the content on the page.
-
Layout
Layout Areas create page structure and hold Widgets. Click here for a more in depth explanation of how they work and how to use this panel.
THE INSERT LINKS PANE
Inserting links is pretty straightforward in the Sandhills CMS. Just fill out the form and click the green “INSERT LINK” button at the bottom of the pane.
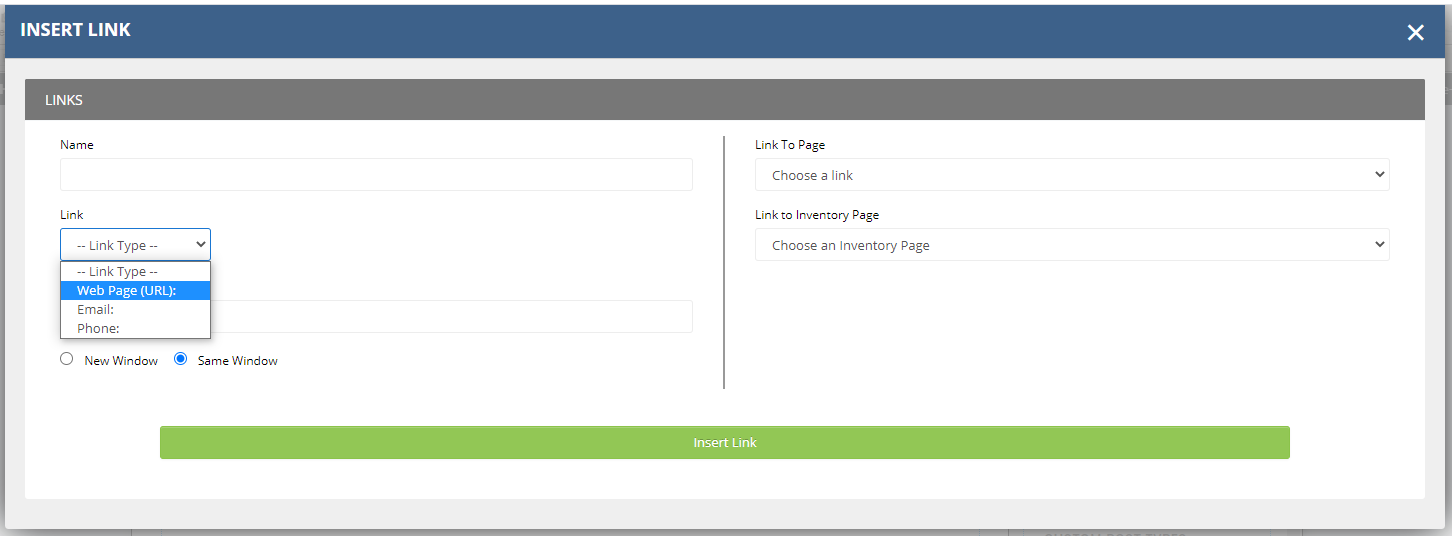
Left Pane: Add new link
-
Name
This is the text that will show on the page that is the link. It is the text in between & . If you have highlighted any text before clicking the link button, it will be prepopulated for you.
-
Link Type
This is how you create links inside your content. There are three options to help you accomplish any kind of link you would need.
-
Web Page (URL):
This is the most common. It will link to another page on your site or a different website. You can use a relative path to another page on the site or use the full file path (https://... .com) to link anywhere on the web. If you are linking to a different site, be sure to add the " https:// " before the link or it will try to resolve the URL inside your own website, usually resulting in an error.
-
Email:
Just type in the email address you want communications sent to. Think of these links as a contact form without the form. These links will add a "mailto:" link which automatically opens the user's default mail client and creates a blank email with the address entered in the To: field.
-
Phone:
Just type in your full phone number with area code. If a user clicks on it, it will try to call that number. This is obviously works best on mobile devices, but will try to use any software phones the user has on their computer if configured. It's probably the least used, but it does help search engines index your phone number.
-
Description This adds a title tag to the link for SEO.
-
New / Same Window Selecting “New Window” will open the link in a new browser tab. Use this to link to pages on different websites or when you want users to be able to easily get back to the page you are linking from. Choosing "Same Window" will replace the current page with the new one in the user's browser.
Choosing "New Window" adds the target=”_blank” attribute to the link. Be aware that due to the iframe that the editor sits in, if you click a link while logged in, it will not open in a new page. You must log out to test that the New Window functionality works. Or just look at the HTML using the < > button.
Right Pane: Use existing link
-
Link to Page This is a listing of published pages on the site. If you choose a page from the dropdown it will populate the left pane with the correct options for you.
-
Link to Inventory Page This is unique to sites with Sandhills Inventory already set up. If there is a saved inventory link in the database, you can choose this option to navigate directly to it. It should be pre-populated with all your available options.
WORDPRESS MEDIA & THE INSERT IMAGES PANE
Both the Sandhills editor and the WordPress editor use the standard media functions built into WordPress. As such it really doesn’t matter where you add your media files. If you like the standard WordPress Editor, use the backend tools. If you’re editing a page and need to add a photo, use the Sandhills CMS. Either way they end up in the same big pot of photos.
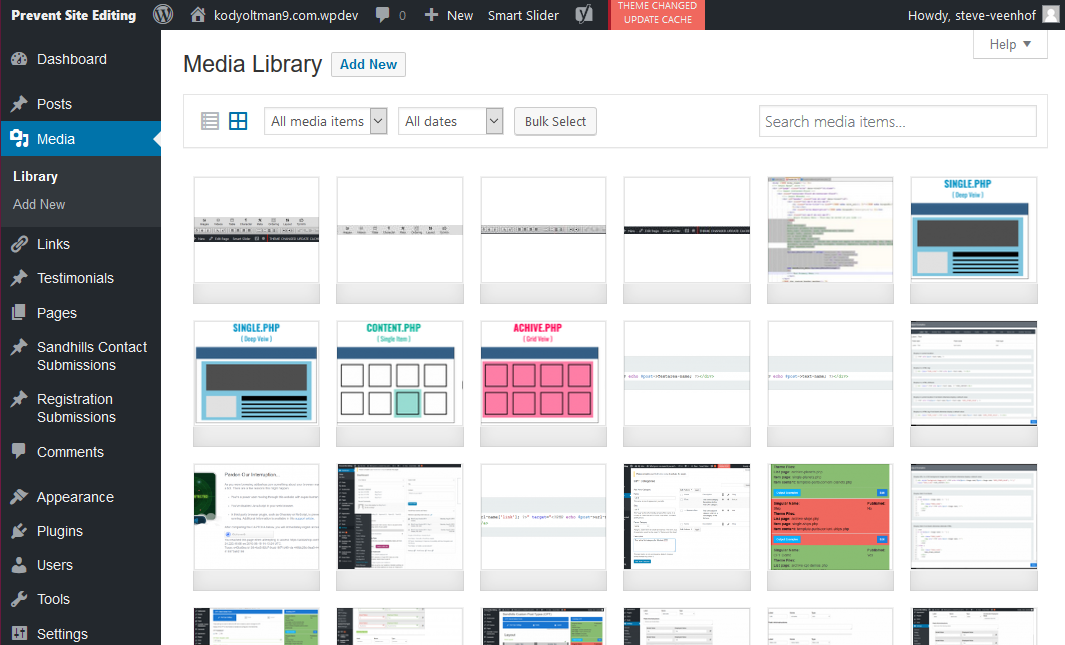
WORDPRESS MEDIA LIBRARY
All media file are stored in the MEDIA > LIBRARY tab in the back of the site. From here you can add new files or manage existing ones. The files are displayed from newest to oldest by upload date, so the photo you just uploaded should always be in the upper left corner of the table.All media files (Photos, PDFs, and .mp4 movies) are displayed in a grid in the main pane of the Media page. Each image does have it's own settings pane as well. Just double click the image and the Attachment Details window will pop up. This is where a lot of the magic happens.
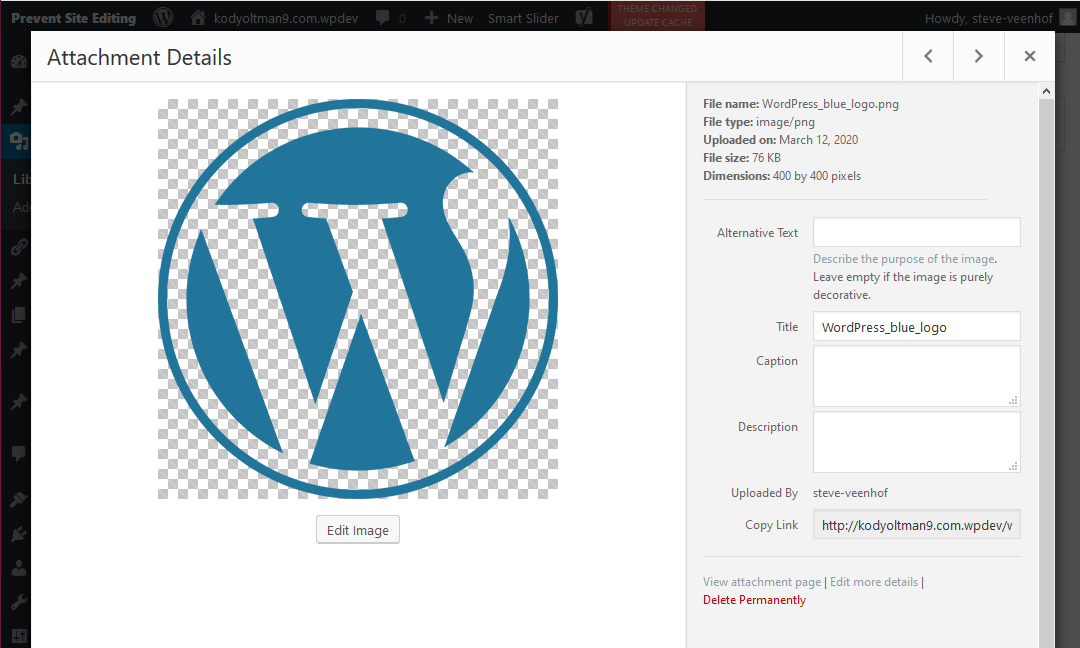
Managing Photo Settings in the WordPress Attachment Details Pane
WordPress has some really nice photo functions built in. If you click the EDIT IMAGE button, you can actually scale the image down to fit your container and WordPress will re-save your file to be a lower image size and still leave the original intact. In fact, one of the quirks of WordPress is that it treats images like they are posts. That means they can be used anywhere on the site, but they can also be their own stand-alone page.
Image Details
There is some good info at the top of the right pane. The most useful pieces are probably the FILE SIZE and the DIMENTIONS. WordPress never overwrites an image, so sometimes you may have several images that look the same in the folder. This will help you determine the size and date uploaded to make sure you are selecting the right image.
Most of these values are valuable for SEO. When any value is set back here, every time you place the image with the CMS editor it will prepopulate with this setting.
Copy Link
This is the easiest place to find the URL for your image to manually insert it anywhere in the files or on the site.
We recommend only copying the relative path, not the full absolute path. ( Only use the part from "/wp-content/..." back instead of using the absolute path with the URL added "
There really aren't many more details, but it's a larger interface to edit the settings above.
This is how you remove an image from the Media Gallery. Just click the button and confirm you want to delete it.
SANDHILLS MEDIA MANAGER
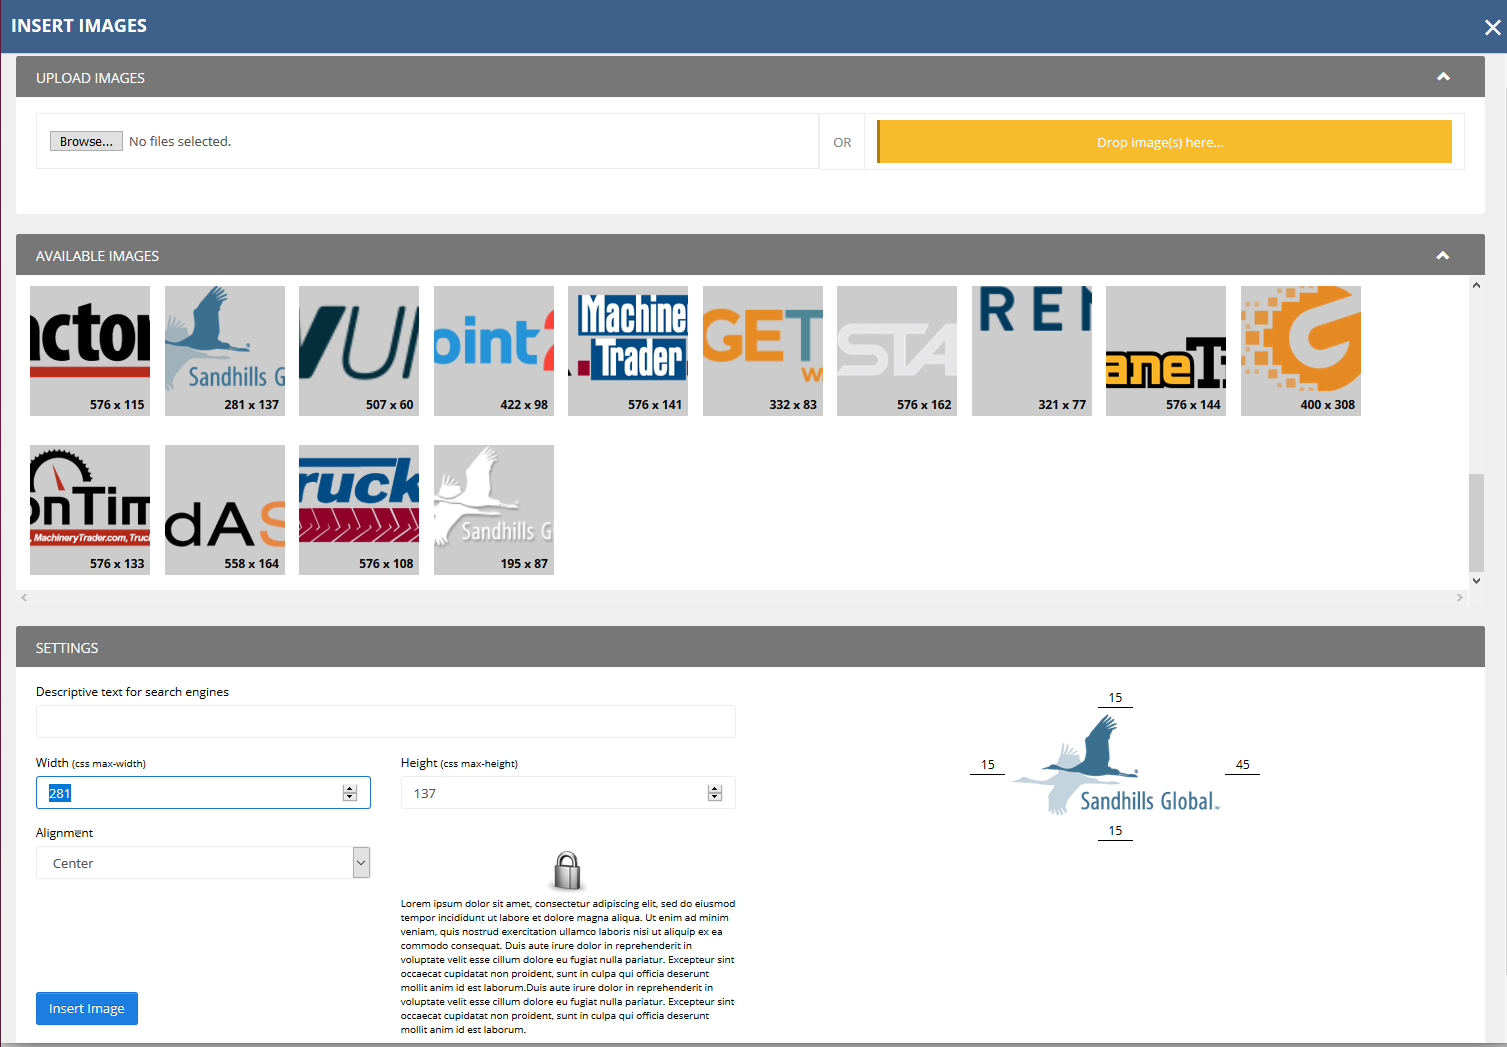
Uploading Images
Once you’ve added the images, you will see a preview of those images below the upload area. These images have not yet been uploaded to the server. You must click on the green UPLOAD IMAGES button to add them to the AVAILABLE IMAGES (Media Library). Once they show in Available Images, they are ready to be added to a page.
IMAGE SETTINGS
Click on the image you would like to add to the page from the AVAILABLE IMAGES pane. There are thumbnails of the images and the image dimensions to help you select the correct one. Once you click on an image it will show up in the preview area the right side of the settings pane, below the media library. To change images, just click on a different image in the AVAILABLE IMAGES pane.
Once you have the correct image selected, you can fill out the settings. These add the CSS to the image so that it is styled correctly on the page. This isn’t an exhaustive range of options, but should handle 90% of what you would actually use the editor for. Below is a list of the options and how to use them.
-
Descriptive text for search engines This adds alt text to the image. It is here mainly for SEO, but is also used by screen readers or is displayed if the image can’t be found on the server (moved or deleted). You can type anything you want in here.
-
Width / Height These are bound together. If you change one, the other will recalculate. These are max-height / max-width tags, so the images will still scale down on smaller screens or mobile devices.
-
Alignment Left, Center, Right. These will add float:left; float:right; and margin:auto; style tags. The picture of the lock and the text will show you how the text and image will interact for each of the different settings.
-
Margins Margins can be added to any side of the image independently by typing the number of pixels (px) in the boxes on the corresponding side of the image preview. When in doubt, 15-30 is a good safe range. If you choose center alignment, the left and right margins will be set to “auto,” allowing the image to center horizontally in the space available.
Inserting Hosted Video Files.
WordPress will actually treat Videos like images. You can upload them through the media manager and insert them into the webpage just like they were a photo. However, WordPress does not do ANY video conversion for you, so make sure it’s a widely supported format before you upload it. Currently the best bet is an H.264 encoded MP4. Click this link to find out what the current standards are for video and which browsers support them. https://caniuse.com/#search=video%20format
Video in Background Elements
If you want to use video backgrounds, you can upload them via the media manager and get the URL for the video in the backend WordPress Media Manager. Then you can use that URL in your CSS class that sets the background video. You can set the class with your background on the element by setting it manually in the template, calling the class with the background widget, or adding it directly in the HTML inside the widget itself.
INSERT VIDEO PANE
We use YouTube and Vimeo video for a myriad of reasons, but the big one is just ease of use. Video is fairly complex and resource intensive to manage on the server itself. YouTube and Vimeo do a great job of converting all video types to web-friendly formats and serving the correct format based on bandwidth and device screen size. Plus it’s fairly easy for our customers to work with. Just seems to make sense.

Video Pane
-
Go to YouTube and find the video you are looking for -
Copy the share link by clicking the SHARE button, then copying the link from the pop-up window. -
Navigate back to the site and paste it into the YouTube URL field. You will see a preview of the video. -
Click the Insert Video button and you’re done!
Videos will insert inside the content area. Videos are fully responsive and will scale to fill the screen or their container.
If you’d like to limit the size of the video, you can set a Maximum Width or Maximum Height in the Insert Video Pane. The video will still shrink to fit it’s container, but won’t grow larger than the specified size.
You can do the exact same thing with videos hosted on Vimeo as well. Just paste the URL of the video into the VIMEO URL field.
INSERT TABLE PANE
You won't use this often, but there are definitely times when you need an actual table to display data. Tables are notoriously painful to edit, so don't feel bad if you get it wrong a few times. We gave you an undo button for a reason.
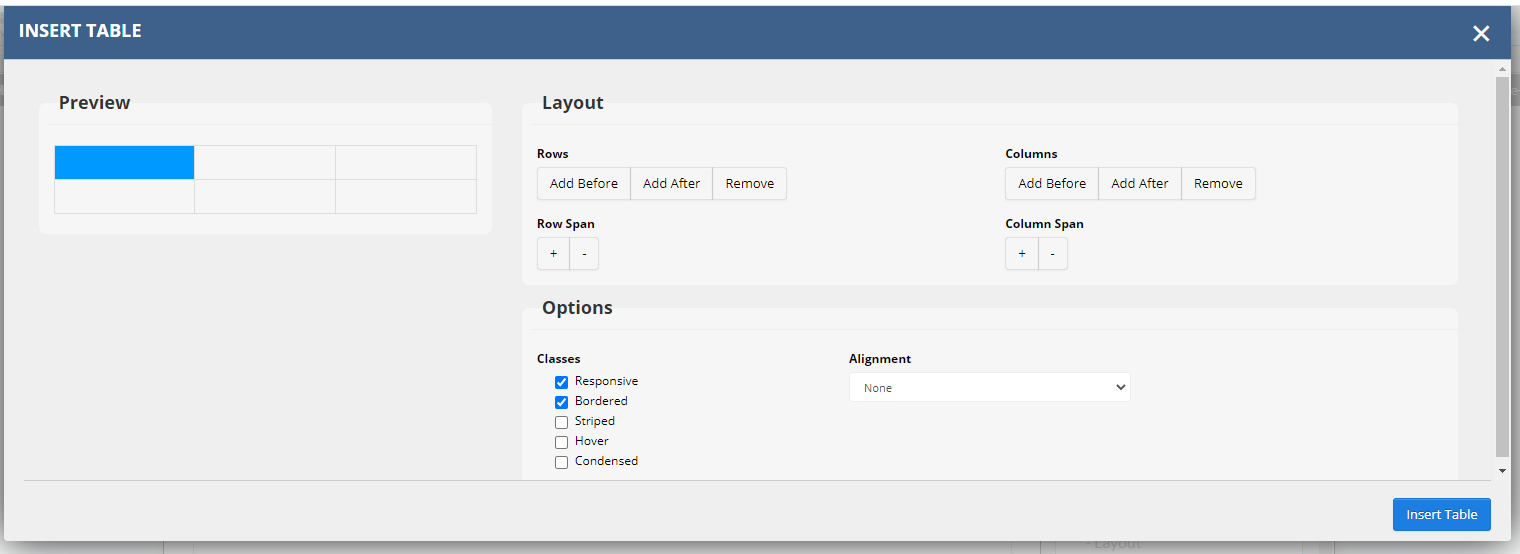
The tool itself is pretty intuitive. You will see a
PREVIEW
of the table you are going to insert in the left-hand pane. There is always one blue square active, which is the key for adding and removing cells or combining cells vertically and horizontally. If you need to change the key cell, just click on the one you need.
You actually edit the number of rows and columns by using the options in the
LAYOUT
section on the right side of the tool. You can add additional and remove rows and columns by clicking the corresponding buttons in this pane. You can also combine cells from multiple rows and columns using these tools. All actions are based on the key cell in the preview pane, which is highlighted in blue.
The
OPTIONS
pane adds some additional classes to your table to make it responsive on mobile devices and to give your table a little pizzazz. Check the options you would like added to your table.
You can also choose the text alignment with within the cells from the ALIGNMENT drop-down on the right. Choose from none (default), left, center, or right text alignment.
For reference, the
ex
ample
table below uses the RESPONSIVE, BORDERED, STRIPED, and HOVER options with left alignment.
| Heading 1 | Heading 2 | Heading 3 | Heading 4 |
| A | B | C | D |
| 1 | 2 | 3 | 4 |
M odifying an existing table

Remember those grayed out boxes in the middle row of the editor? Now is when they come into play. Click into the cell you would like to be your key cell and use the buttons to add and remove cells, rows, and columns. If you are comfortable with HTML, you can also edit the table itself in code view by clicking the <> button.
Once again, remember you have an undo button if things get wonky.
SPECIAL CHARACTERS PANE
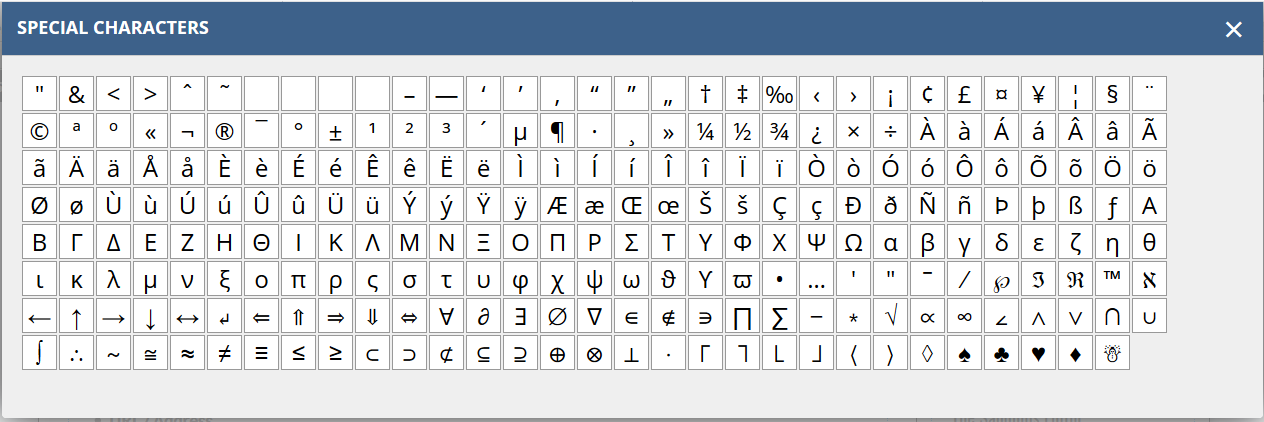
A window will pop up with all available special characters. Click the one you would like to add and the window closes with that character inserted into the content.
Insert Icon
This is a simple tool to make it easier to add icons to content areas. Just position your cursor where you would like to add your icon, then click the Icon tab and it will pop up a window that will allow you to choose your icon and insert that icon wherever your cursor is in the editor.
-
Choose your Icon Family
Choose the font or icon library you want to use from the first select box. This will populate the display window of icons below. The tool has some popular libraries preloaded, but we can add new ones as needed. The system should work with any SVG or font-based icon library.
-
Click on the Icon of your choice
When you click on an icon in display pane, it will populate a preview in the upper right corner. It also gives you the HTML that you can use to display that icon if you need to insert the icon in HTML view.
-
Add a color
(optional)
Now that your icon is selected, you can add a hex code, RGB value or just the HTML color name to colorize your icon. If nothing is set, it will just be the default color of the text block it is in.
-
Click the green INSERT THIS ICON button
If you are comfortable editing in HTML view, we also supply the snippet of code that you can use to insert the icon programmatically. Just copy the code snippet right below the preview of your icon and paste it in your HTML where you want to use it.
Searching for an icon
Keep in mind you may have to be a little creative to get the icon you want. For example, if you search "email" you will get a limited number of icons. If you don't see what you are looking for, you may have to search for just "mail" or "envelope" to get the icon you really want.
Enabling an Icon Library.
To activate additional Libraries, go to SETTINGS > ICON FONTS
ORDERING TOOL
It works pretty simply.
-
Click the ORDERING button. You will see most of the editor deactivate. You cannot edit content in ordering mode.
-
Grab the Widget that you want moved. This will affect the whole stripe, not one small block.
-
Hold down the mouse button and drag the new content to wherever you want it to display. You will see a light blue bar about 50px tall will show up in between widgets as you move up or down.
-
When that blue bar is where you want to insert the widget you are moving, let go of the button and the widget will be positioned in this location. Please be aware that you cannot drag one widget inside another widget.
-
Click the Ordering button again or save the page to turn the editors back on.
LAYOUT TAB
This is how you alter the Layout Areas on the page. It was discussed in detail in Layout Ares vs. Widgets .